
Barcode Tool
The Barcode Tool builds editable vector QR codes and barcodes in Illustrator. Use its visual controls to choose an encoding format, validate data, place and style the generated artwork, name or tag its parts, and capture the configuration as a Darty barcode method row.
This guide covers the practical editor workflow in Tools → Methods → Barcodes and the related Barcode method editor in Builder. For the complete property list, accepted aliases, supported formats, and spreadsheet examples, see the Barcode method reference.
Standalone Tool and Builder Editor
The two Barcode editors share most configuration controls, but their final actions are intentionally different.
| Editor | Purpose | What Apply does |
|---|---|---|
| Tools → Methods → Barcodes | Generate and test barcodes, and author one-method Table previews. | Captures the current row and runs it through the normal Darty table-dispatch path. |
| Builder → Add or Edit Barcode Method Block | Add Barcode property columns to a complete multi-method Darty sheet. | Updates the Builder block only. It does not generate artwork or add a row to the standalone Barcode Table. |
The standalone tool has Barcode and Table tabs plus Reset, Generate, Add Row, Apply, and Apply to Selection actions. Builder reuses the Barcode configuration interface without the standalone Table or generation actions and adds property-column activation and a Skip control.
See Builder Method Blocks for adding, editing, and activating properties in a Builder block.
Barcode Editor Screenshots
The Barcode editor is taller than the extension viewport, so the following two captures show its upper and lower sections in order.
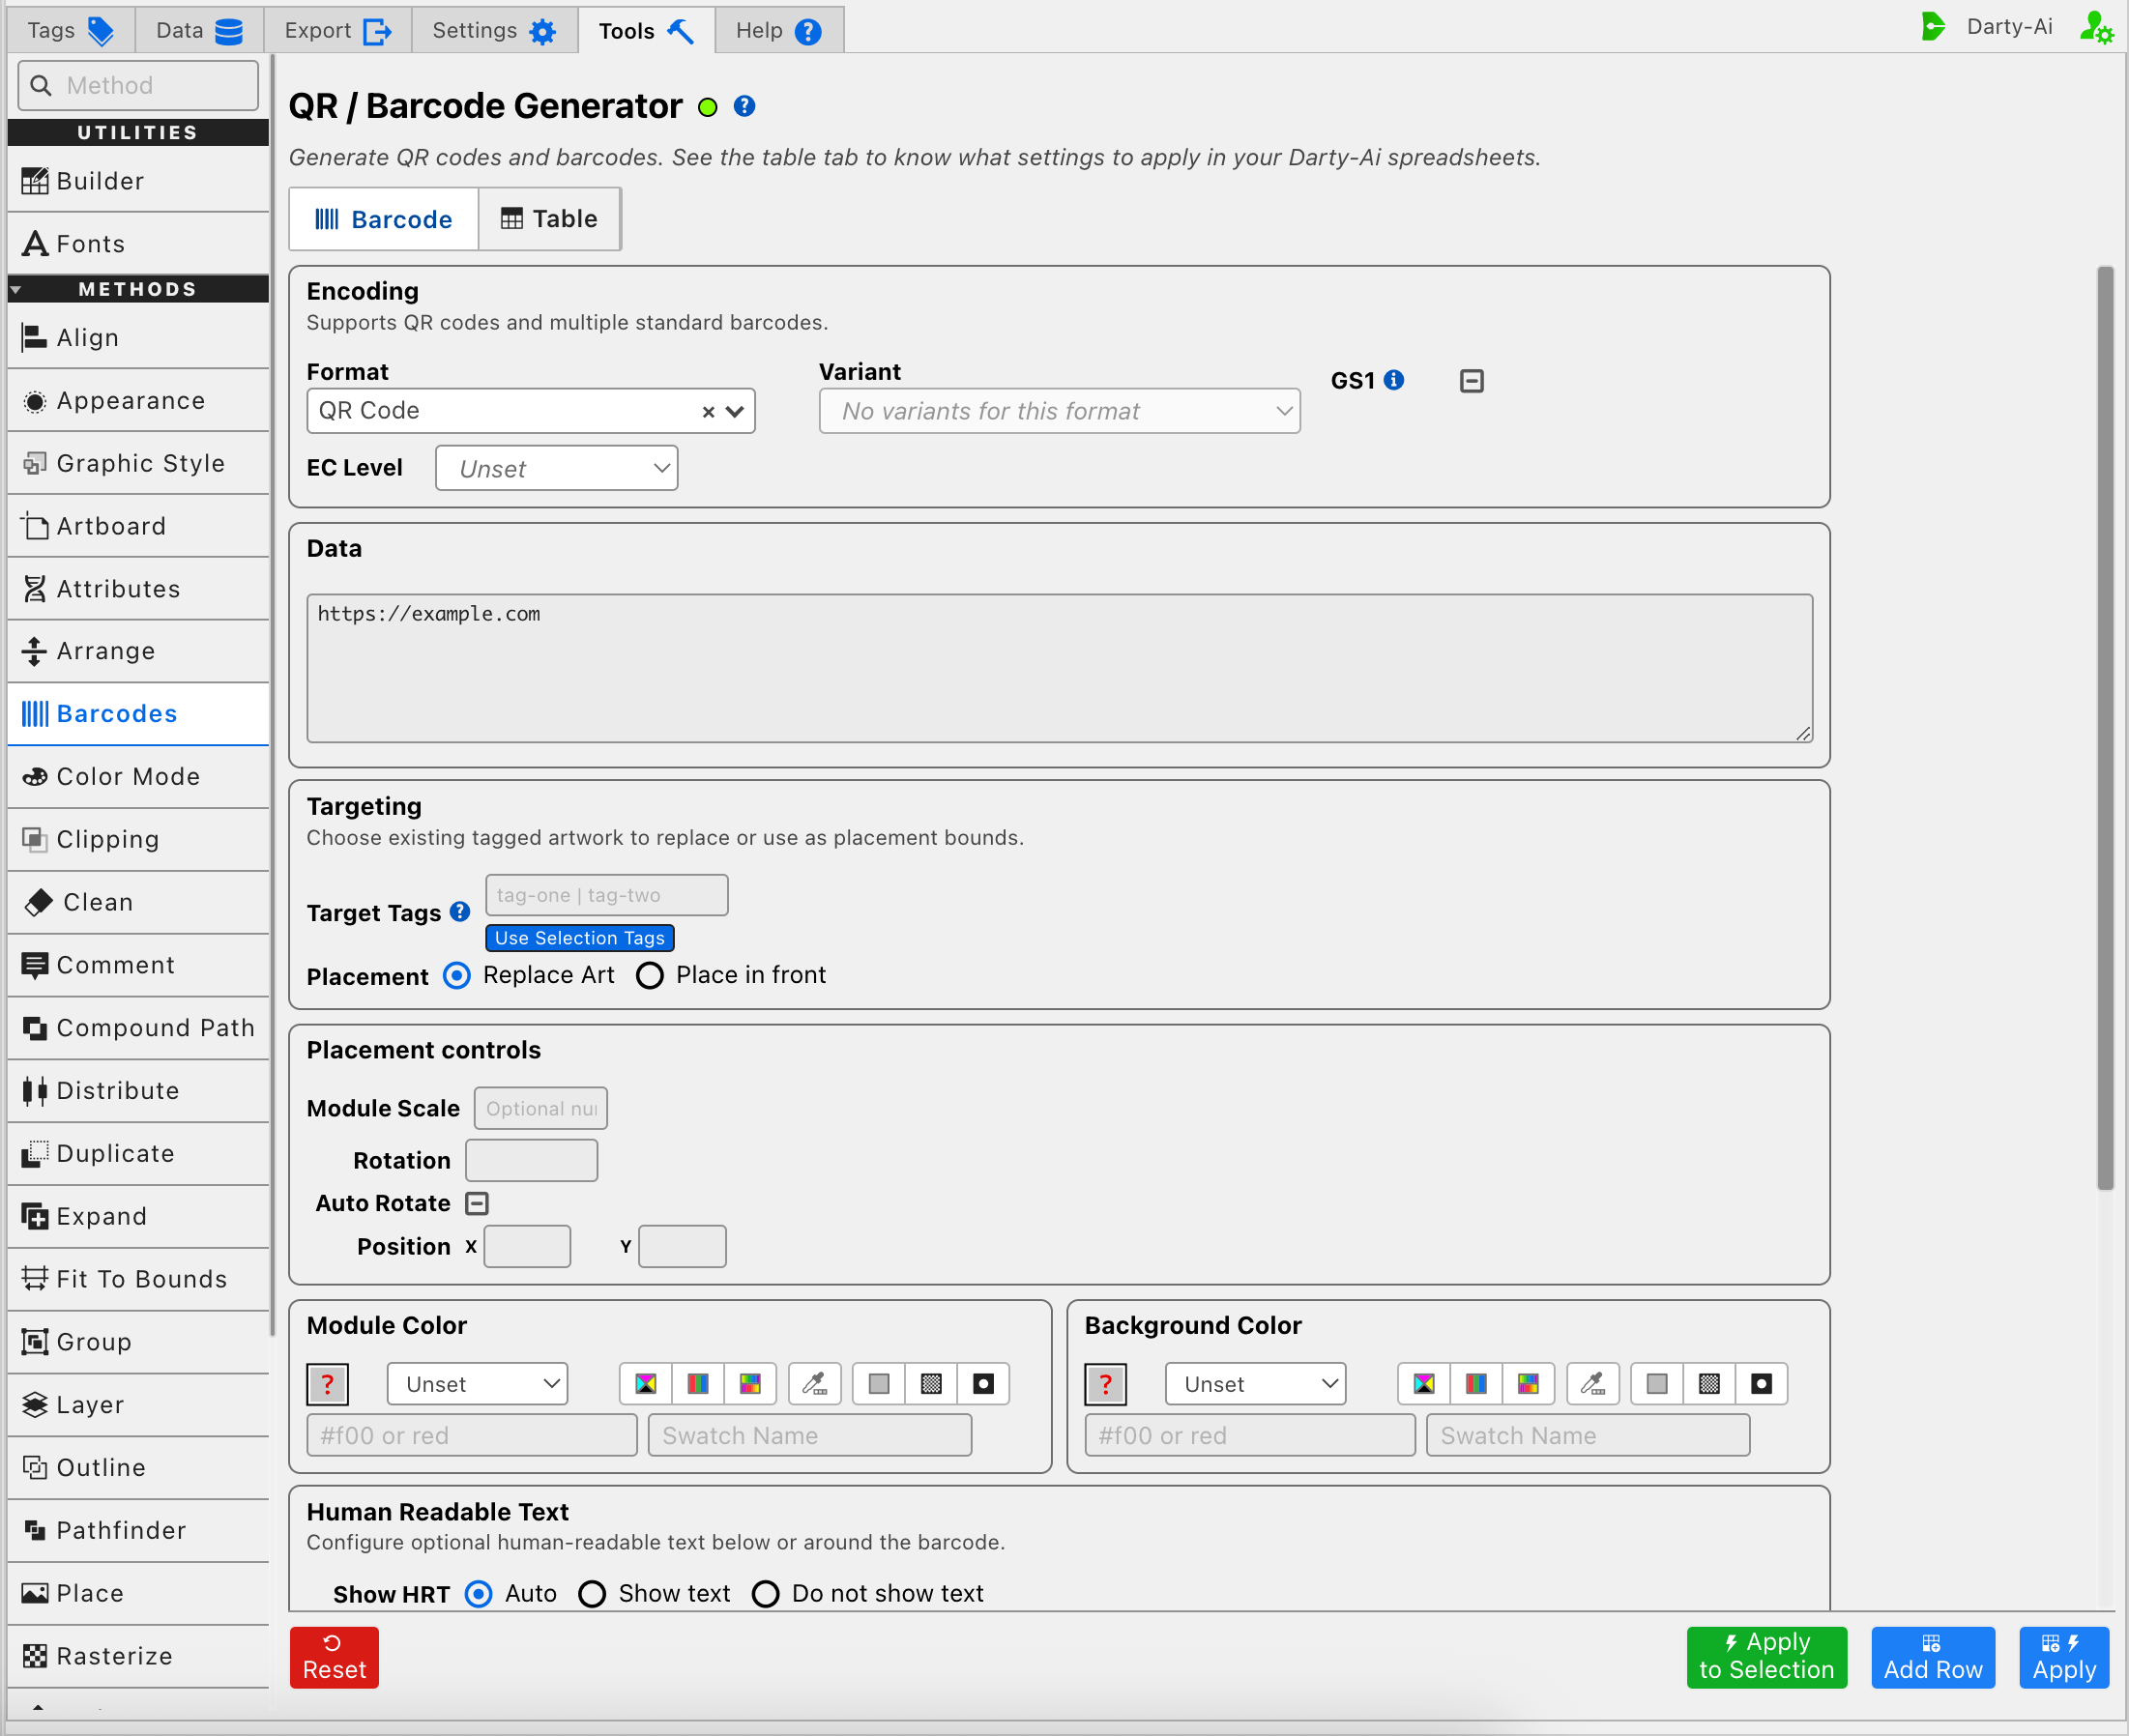
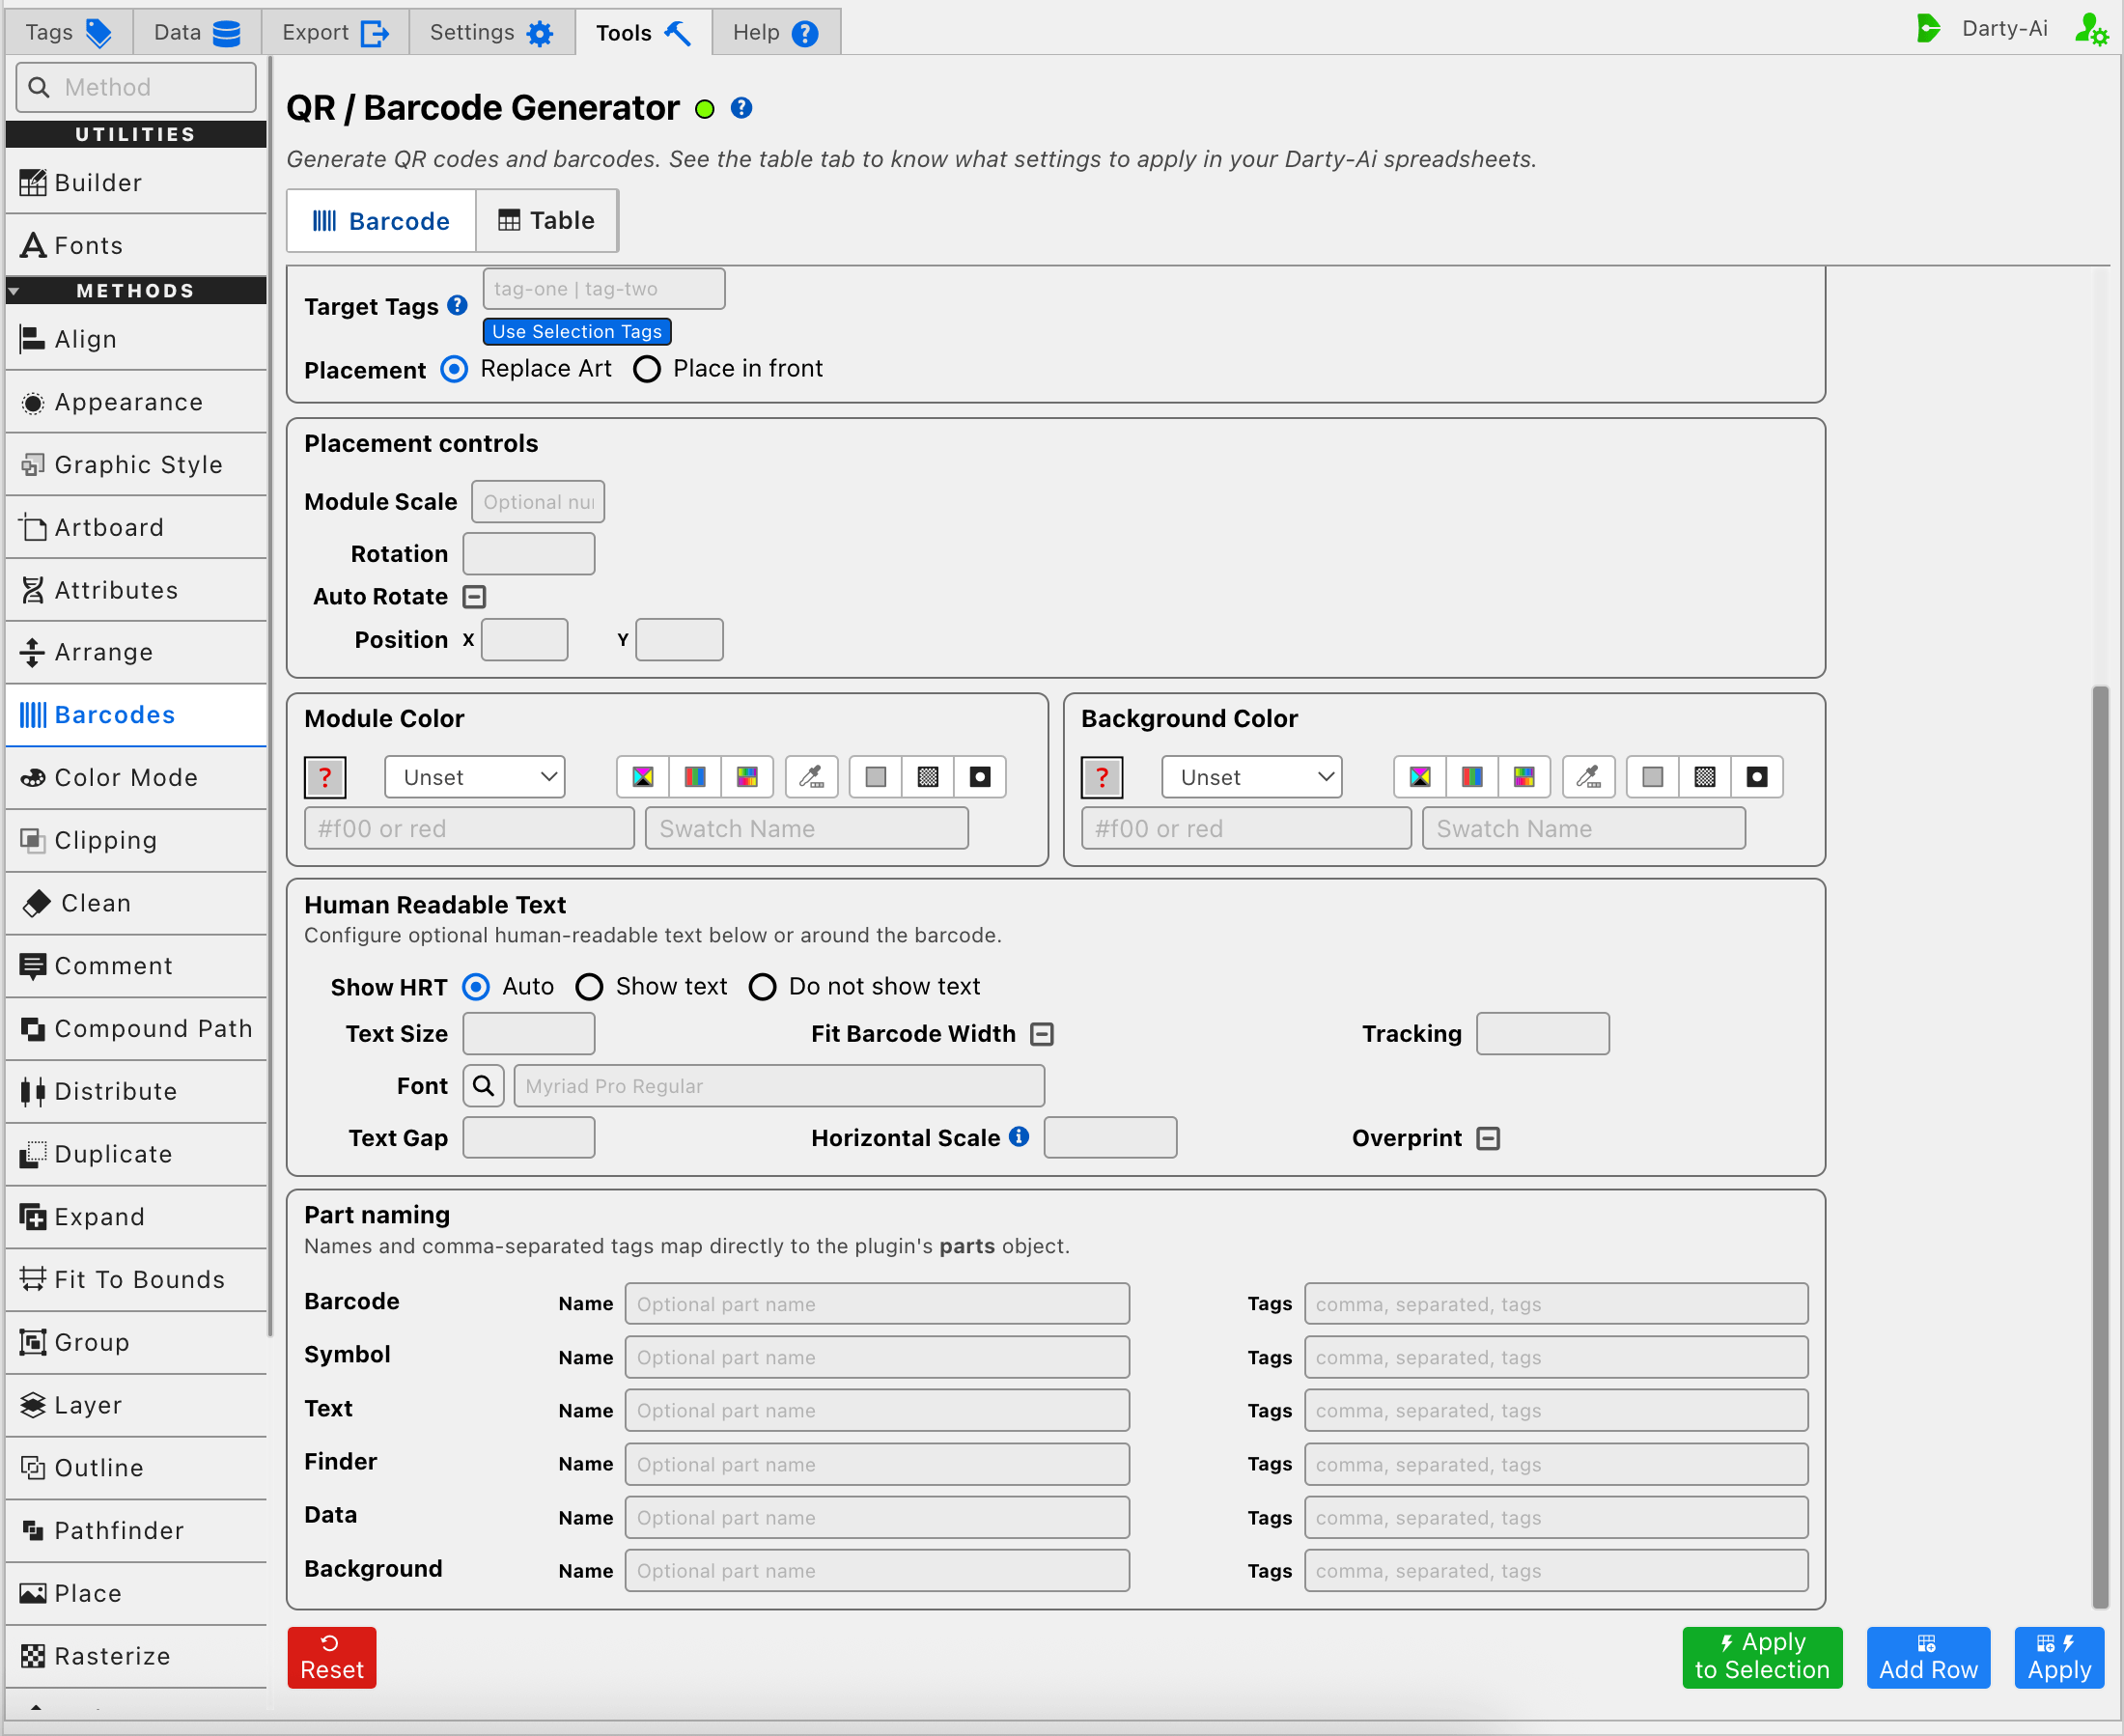
Configure a Barcode
A reliable configuration order is:
- Select the Format and optional Variant.
- Enter valid data or configure a GS1 Digital Link.
- Choose whether to place at document coordinates or into tagged artwork.
- Configure rotation, scale, and colors.
- Configure human-readable text when the format supports it.
- Optionally name or tag generated parts.
- Review the status, then Generate, Add Row, or Apply.
The status dot beside QR / Barcode Generator reports the current validation state in its tooltip. Errors and warnings also appear below the title. Configuration changes trigger a background dry-run check after a short delay; this verifies the generator request without placing normal barcode artwork.
A successful generator check confirms that the request can be processed. It does not prove that a barcode will remain scannable after later scaling, color conversion, export, printing, or production handling.
Encoding
Format and Variant
Format is required. The searchable Format control shows the formats reported by the installed barcode generator, with a built-in format list used when capability lookup is unavailable. Examples include QR Code, Code 128, EAN and UPC formats, Data Matrix, PDF417, Aztec, DataBar, ITF, and GS1 Digital Link QR.
The icon beside the selected format distinguishes linear and two-dimensional barcode families. The optional Variant control becomes available only when the selected format reports compatible variants. Changing Format automatically clears an incompatible Variant.
See Barcode Formats for descriptions, family and alias distinctions, and selection guidance. The Barcode method reference lists the names accepted in Darty sheets.
Error Correction and GS1
The editor reveals format-specific controls only when they apply.
| Control | Appears for | Behavior |
|---|---|---|
| Error Correction | QR Code, Micro QR Code, and rMQR formats | Selects L, M, Q, or H, representing approximately 7%, 15%, 25%, or 30% recovery. Higher levels produce a denser symbol. |
| GS1 | Code 128, QR Code, and Data Matrix | Enables the generator's GS1 mode. It is separate from the structured GS1 Digital Link format. |
| Variant | Formats with reported variants | Selects an optional generator-supported form of the current format. |
Code 128 GS1 mode adds FNC1. QR uses GS1 first-position mode. Data Matrix GS1 output should be tested against the scanner and specification requirements of the intended workflow.
Data
For ordinary formats, enter the text or numeric content in Data. The required length, character set, and check-digit rules depend on the selected format. A URL is appropriate for a QR code, while retail formats such as EAN or UPC require format-specific numeric content.
The editor sends the current encoding configuration through background validation. If a format rejects its data, correct the data before generating or applying the row.
GS1 Digital Link QR
What GS1 Digital Link Is
GS1 Digital Link is a standard for expressing existing GS1 identifiers, such as a GTIN, inside a Web address. It does not replace the GTIN or create a new product identity. Instead, it gives scanners, applications, and ordinary Web browsers a consistent way to recognize the identifier and connect it to online information.
An ordinary QR code can contain any text or URL. A GS1 Digital Link QR contains a URL with a standardized GS1 structure. For example:
https://id.gs1.org/01/09501101530003/10/LOT-204/21/SN-1832
| URI part | Meaning |
|---|---|
https://id.gs1.org | Resolver domain that receives the Web request. |
01/09501101530003 | Application Identifier 01 followed by the product's GTIN. |
10/LOT-204 | Optional Application Identifier 10 and its batch or lot value. |
21/SN-1832 | Optional Application Identifier 21 and its serial number. |
A resolver can connect that identified product, batch, or individual item to one or more resources, such as product information, instructions, traceability data, recall status, or a service API. Those destinations can change without changing the GS1 identifier encoded on the item. See the official GS1 Digital Link standards and GS1-Conformant Resolver standard for the complete model.
Darty constructs the GS1 Digital Link URI and encodes it in a QR code. It does not register the GTIN, publish product information, or configure where a resolver sends the user. The GS1 identifier owner must arrange those resolver destinations separately.
Selecting GS1 Digital Link QR replaces the ordinary Data field with a structured Digital Link editor and a read-only URL preview.
| Field | Use |
|---|---|
| Resolver Domain | Base resolver URL. The default is https://id.gs1.org. A missing scheme is normalized to https://. |
| GTIN | Required 13- or 14-digit identifier. A 13-digit value receives an automatically calculated check digit; a 14-digit value must contain a valid check digit. |
| Batch / Lot | Optional GS1 AI 10 path value. |
| Serial Number | Optional GS1 AI 21 path value. |
| Expiry Date | Optional AI 17 date. Select it as YYYY-MM-DD; the generated URI uses YYMMDD. |
| Best Before Date | Optional AI 15 date. |
| Production Date | Optional AI 11 date. |
The URL preview updates as the structured fields change and reports invalid GTINs, resolver URLs, or dates.
Enable Use raw URI (manual entry) when you already have a complete Digital Link URI. This disables the structured fields and requires a valid Raw URI. If the scheme is omitted, Darty adds https://.
The Table preview serializes this specialized choice as the Darty format GS Digital Link QR Code. See GS1 Digital Link QR for the resulting properties.
Targeting and Placement
The barcode can be created at document coordinates or placed into tagged artwork.
| Targeting choice | Available placement behavior |
|---|---|
| Tag Search is blank | Enter Scale and document X/Y Position. Rotation and Auto Rotate remain available. |
| Tag Search is present | Darty resolves matching artwork as the placement target. Choose Replace or Place in front. Scale and document X/Y are omitted from the generated row. |
| Apply to Selection | The current Illustrator selection becomes a temporary target for this one action. The stored Tag Search and standalone Table are unchanged. |
Type a Darty tag search or use Use Selection Tags to copy the tags from selected artwork into the field.
Replace or Place in Front
Replace is the default for tagged placement. The matching target is replaced by the generated barcode. Choose Place in front to preserve the target and place the barcode above it; this writes replace:false.
The placement choice affects tagged targets only. When Tag Search is blank, the barcode is created using its Scale and X/Y Position instead.
Rotation and Auto Rotate
Rotation sets an explicit angle in degrees. Auto Rotate lets Darty rotate a barcode when that helps it fit its target. Leave Auto Rotate Unset when the row should not explicitly enable or disable that behavior.
The Barcode method accepts additional manual sizing and quiet-zone properties that are not exposed by every current visual control. See Placement and Sizing before adding those columns directly in a spreadsheet or Builder.
Module and Background Colors
Module Color controls the bars or modules. Background Color controls the optional area behind the symbol. Each starts Unset and is omitted until configured.
Both color editors support:
- None, Swatch, raw Color, CMYK, RGB, Lab, Grayscale, HSB, HSV, and HSL modes.
- A visual color preview and an Illustrator color picker.
- Split channel values for explicit color models.
- Optional Process, Global, or Spot color type.
- A document swatch name.
The configured model determines which properties appear in the generated row. For example, RGB module color produces moduleColorModel, moduleColorR, moduleColorG, and moduleColorB rather than one combined value.
Preserve strong contrast between the modules and background. Avoid relying on transparency, low-contrast colors, or later non-proportional stretching without testing the final output. See Colors and Overprint for the serialized properties.
Human-Readable Text
Show HRT controls the text printed with a barcode.
| Setting | Result |
|---|---|
| Auto | Omits addHRT and lets the selected format use its normal behavior. |
| Show text | Writes addHRT:true. |
| Do not show text | Writes addHRT:false and hides the text-formatting controls. |
When text is available, configure:
- Text Size.
- An installed Font.
- Text Gap between the symbol and text.
- Fit Barcode Width.
- Tracking.
- Horizontal Scale.
- Overprint.
The font picker uses installed Illustrator fonts. Background validation can report when the selected font is not found in the loaded font list. Not every barcode format produces human-readable text, even when text is requested.
See Human-Readable Text for units, aliases, and accepted spreadsheet properties.
Name and Tag Generated Parts
Part naming makes generated artwork easier to target in later Darty rows. The editor provides Name and comma-separated Tags fields for:
- Barcode.
- Symbol.
- Text.
- Finder.
- Data.
- Background.
Leave fields blank when no name or tags are needed. Part tags are literal tags, not tag-search expressions; characters used as tag-search operators are rejected. Separate multiple tags with commas.
Some parts exist only for relevant formats. Finder and Data are useful for matrix symbols, while Text requires a generated human-readable text part. See Naming and Tagging Generated Parts for the property names.
Choose the Correct Action
The standalone Barcode action bar provides several authoring and execution paths.
| Action | Generates or changes Illustrator artwork | Changes Barcode Table | Dispatch path |
|---|---|---|---|
| Reset | No | Clears it | Restores the default blank Format, sample Data, targeting, styling, and action settings. |
| Generate | Yes | Adds or replaces a row after successful generation | Calls the barcode generator directly, then opens Table. |
| Add Row | No | Adds or replaces a row | Serializes the current controls for later use. |
| Apply | Yes | Adds, replaces, or updates a row | Runs the captured row through the normal Darty table-dispatch path. |
| Apply to Selection | Yes | No | Dispatches once against the current Illustrator selection using a temporary target. |
Generate Versus Apply
Use Generate when your immediate goal is to create the barcode through the dedicated generator and inspect the result. A successful Generate records the configuration in the Barcode Table and opens that tab.
Use Apply when you want to test the same row through Darty's normal spreadsheet dispatch. Apply records the row according to the Table's append setting, dispatches it, and follows the shared focus-Table preference.
Both actions use the current target and placement values. Apply to Selection is the one-time testing path when the selected artwork should be targeted regardless of the Tag Search shown in the editor.
See Tools Method Actions and Apply Modes for Reset, Add Row, Apply, Apply to Selection, editing behavior, and the Continue action used during a delayed Illustrator response.
Validate and Troubleshoot
The tool combines immediate field checks, background generator validation, and final action responses.
| Message or condition | What to check |
|---|---|
| Format is required | Select a Format before Add Row, Generate, or Apply. |
| Invalid format | Choose a value from the current generator-supported Format list. |
| Data rejected | Confirm length, characters, check digits, and format-specific rules. |
| GTIN error | Enter 13 digits for automatic check-digit insertion or a valid complete 14-digit GTIN. |
| Invalid raw URI or resolver | Enter a valid URL; https:// is added only when the remaining value is a valid URL. |
| Invalid part-tag characters | Enter comma-separated literal tags without tag-search operators. |
| Font warning | Choose an installed font or refresh the font list used by the extension. |
| No selection | Select Illustrator artwork before Apply to Selection. |
| Capability warning | The extension is using its fallback format list; confirm generation with the installed barcode component. |
After generation, inspect the vector artwork and scan the final exported or printed result. Keep an adequate quiet zone and do not distort the symbol non-proportionally.
Use the Table Preview
The Barcode Table stores each captured configuration as a Darty row beneath the standard four-row header. It supports the shared Tools Method preview workflow:
- Append or replace future captures.
- Edit a row back in the Barcode controls.
- Apply one stored row.
- Reorder or delete rows.
- Copy the complete table.
- Download CSV or Excel.
When editing a stored row, Apply updates and dispatches that row. Add Row preserves the original and appends the edited controls as a new row.
The Table is working state for the standalone Barcode Tool; it is not automatically inserted into Builder or Data. Copy or download it when you need to retain it. See Tools Method Table Preview for the complete behavior.
Add Barcode to Builder
- Open Builder and select Add Method Block.
- Choose Barcode.
- Select a Format and configure the encoding, data, targeting, placement, colors, text, and parts you need.
- Activate the optional property labels that should become columns in the block. Entering a serializable value can also activate its property.
- Configure Skip only when the method should be conditionally skipped by data rows.
- Select Apply to add or update the Builder block.
Builder Apply changes the sheet structure only. To execute the finished sheet, save or load it through Darty's normal Data workflow. Returning to the standalone Barcode Tool does not show rows authored in Builder because the two surfaces do not share a Table preview.
Recommended Workflows
Generate a QR Code at a Document Position
- Select QR Code and enter the URL in Data.
- Leave Tag Search blank.
- Enter Scale and X/Y Position; optionally set Rotation.
- Configure Module and Background colors.
- Select Generate.
- Inspect the artwork and the captured Table row, then test the output with a scanner.
Place a Barcode into Tagged Artwork
- Select a format and enter valid data.
- Enter the target Tag Search or use Selection Tags.
- Choose Replace or Place in front.
- Configure Auto Rotate or an explicit Rotation if needed.
- Select Apply to author and dispatch a reusable row, or Generate to call the barcode generator directly.
Build a GS1 Digital Link QR
- Select GS1 Digital Link QR.
- Enter a 13- or valid 14-digit GTIN.
- Add optional batch, serial, and date values.
- Inspect the URL preview, or enable Use raw URI for a complete prebuilt link.
- Choose an error-correction level appropriate for the production environment.
- Generate and scan-test the final result.